
Forum Replies Created
-
AuthorPosts
-
Hi Jose
You can use the SQL below to display any custom appointment fields you have into the appointment list.
select

app.id, start, finish, app.per_id,


case

when (description is not null) and (description <> '') then description

else per.lastname || ', ' || per.firstname || ' with ' || staff.knownas || ' '

end as _description,


trim(per.lastname || ', ' || coalesce(per.firstname,'') || ' ' || coalesce(per.title,'')) as _patient_name,

staff_id, apptype_id, appstatus_id, app.clinic_id, room_id,

staff.knownas as _staff_name,

apptype.name as _appointment_type,

appstatus.name as _appointment_status,

clinic.name as _clinic_name,

room.name as _room_name,

app.createdon, app.createdby_staff_id, cr_staff.knownas as _createdby,

app.updatedon, app.updatedby_staff_id, up_staff.knownas as _lastupdatedby,


@FIELDS:custom_app_fields


from app

left join staff on (app.staff_id=staff.id)

left join per on (app.per_id=per.id)

left join apptype on (app.apptype_id=apptype.id)

left join appstatus on (app.appstatus_id=appstatus.id)

left join clinic on (app.clinic_id=clinic.id)

left join room on (app.room_id=room.id)

left join staff as cr_staff on (app.createdby_staff_id = cr_staff.id)

left join staff as up_staff on (app.updatedby_staff_id = up_staff.id)

left join custom_app_fields on (custom_app_fields.app_id=app.id)
Hope this helps.
Hi Daniel
Thanks for the post. This problem would be caused by the payment not being allocated to the invoice. You see the invoice will still be outstanding because nothing has been allocated against it but the patient’s balance would be £0 because this is calculated based on invoice/payment totals and ignores the allocation side.
The easiest way to resolve this issue is to go into the Finances tab. From there click on the Grid Options button and click on drop down menu at the top of the panel. Select the option With Statuses. If you now scroll to the far right hand side of the grid you will notice and extra column called “Statuses”. This will show any invoices and payments that are not being allocated; the text will appear in red.
The quickest way to allocate the payment to the invoice is to open the payment. At the bottom of the payment editor is the allocation area. Tick the pay checkbox for the invoice that the payment should be allocated against. From this screen you can also change the allocation date if you need to. Click the Save and Close button when you are finished.
Please let us know if you are still having problems.
Hi Mike
Thanks for the bringing this to our attention. We have tested this feature back here and it seems to be functioning correctly and we have not had any other reports of this happening. My only thought that could be causing this is if you have custom working hours defined for some of those staff members.
Please could you open the record for the Staff Member that is appearing on a day that they should not be and go to the Working Hours tab. From this screen select Define their hours for a specific week and look at the day in question. If they are marked as working when they should not be then you can simply either untick that day or click the Revert to Default Week button towards the bottom right of the screen. Save and close the record if you have made any changes, refresh the diary screen and see if the staff member is still appearing when they should not be.
Please let us know if you are still having problems.
Hi Roelof
Thanks for providing us with the image. I can see what you mean by the missing date/time on the email editor when you have an inbox email opened. We have added this to our todo list to fix and will make it match the date/time that appears on emails that have been sent.
Hi Roelof
Thanks for reporting this problem. We are currently working on a way so that ClinicOffice can be recognised as the default program for opening eml files. As a temporary work around if you download the eml file to somewhere like your desktop you can drag and drop it into your Email Manager Inbox and this will then allow you to view the email.
Hope this helps.
March 7, 2013 at 11:43 am in reply to: Deleted Staff Member, states username already assigned #33138Hello
Just an idea to fix your problem. If you first of all undelete the first Kate and then open her record. Locate the Username field (default location on the main Staff Details screen) and delete everything in that field. Click the Save button, rather than the Save and Close button and then click the Delete button.
After doing this you will be able to assign the username to the newer Kate record, as you will have removed the existing username. By doing it this way you also bypass the need to open the Set Username and Password screen.
Please let us know if this helps to fix the problem.
Hi Roelof
Thanks for the post. I am not 100% certain with what you mean exactly, but when you right click on an email within the email manager there is an option within the menu called “Related Records”. This will display two links; if the email address of the sender matches an email stored within a contact or patient’s record then the records name will appear as one of those links (under the Related Records). When you select that it will open that related record.
Please try this out and let us know if this is not quite what you meant.
Thanks for the follow-up question. The format for a custom appointment field would be :-
{custom_app_fields!your_custom_field_name!app_id=@id}
Obviously you would need to replace “your_custom_field_name” with the exact name of the custom field in your database.
Hope this helps!
Hi Angela
Thanks for the questions. Please find the replies below.
Does the ClinicOffice program work on a Mac computer? Or only Windows?
ClinicOffice was programmed for Windows only, however there are a few ways you can run it on a Mac. For more information please see this page Does ClinicOffice run on an Apple Mac?
And is it possible to see an overview of the average number of treatments per patient and the number of patients per month or year?
You could use the Appointment List report found under the Reports and Templates section of ClinicOffice. This will allow you to search on the date range of the appointments so that you can see the total number of patients within a month or year. You can also group the grid by the patient’s name by right clicking on the column header Patient Name and selecting Group by this Column. This will allow you to view then the number of treatments each individual patient has had, allowing you to pull the average from it.
Hope this helps.
Hi
Thanks for the email. In ClinicOffice XP the best solution is rather than to delete the staff member is to un-tick the option “This staff member is a Practitioner” under the Staff tab and set their access rights to “This user has NO access to ClinicOffice XP” under the Access tab. This way the staff member will no longer appear in the diary and would not be able to login to the database either. So in effect the record becomes inactive but is still there for past record sake.
Hope this helps.
Hi
Thanks for the question. There are no charges made to your mobile phone if you enter the number in. The number merely serves as a reference for the TextAnywhere service.
Hi Roelof
This will be because you have the option to send a message when the cancelled status has been selected. To prevent this message from appearing please follow the steps below.
1) Go to the View menu
2) Click the Types and Categories button
3) Select Appointment Statuses if it is not already selected
4) Untick the Send Message check box for the Cancelled status
5) Click the Close buttonYou will find that the message will no longer appear, when you cancel an appointment.
Hi Roelof
Thanks for the post. When you go to save your backup ClinicOffice will use the Windows Explorer to do this and hence it will use Windows history to find the previous location your file was saved to. If it is a network drive that has been disconnected and re-connected then this location may not be remembered.
The easiest thing is to save the directory of the backups to your favourites section within Windows Explore. This way when you go to save your backup you can just select the backup location via your favourites.
Hope this helps.
Hi Roelof
Thanks for the post. Would the grid report “Outstanding Invoices (Ageing by Account)” be sufficient for what you need or do you require a more broken down form of it? Alternatively you could use the “Outstanding Invoices” report and search on the “Due Date” field of an invoice.
Please let us know if either one of these reports will meet your requirements.
Hello
Thanks for the post. As you have mentioned recently we have changed the way you can create multiple appointments. The previous method merely created an image of the first appointment, meaning it was one appointment being mirrored onto multiple days. This meant when you went to delete it, it could delete all appointments purely because it was one appointment. The downside to this was that you could not easily report on recurrences of those appointments nor could you assign a patient to the appointment.
The new method actually copies the appointment so that you have more than one physical appointment. The advantage of this is that you can easily report on these multiple occurrences and you can assign a patient to those occurrences.
The quickest way to delete these blocked booked appointments is to by going to the appointment grid view, searching for the appointments and mass deleting from there. To do this please follow the steps below.
*It is recommended that you backup your database before you do this*
1) Click the blue link in the diary “Switch to Grid View” (left of the Diary Options button)
2) Click the Search button
3) Click the Display All Records button (This is between the Search and Refresh buttons)
4) Click Grid Options
5) Click Toggle Grid Filtering (A new line will appear just below the column headers)
6) Type the description of your appointment into the line just below the Description column header
7) You can do the same on any of the other columns you may wish to filter on i.e. “Staff Name”
8) After you have filtered out the unwanted appointments, left click on one of the appointments and press the Ctrl and A keys together
9) Right click on one of the records lines and select Delete AppointmentThis will delete all of the appointments for this recurrence.
Hi
Thanks for the post. We have noticed this with a few users. Although you mentioned you are running the latest 1072 update we did actually make a few adjustments recently to address the issue with the flag not appearing on the diary and re-released 1072. Please download this via the link below and install it.
If you are still having problems even after please let us know.
Hi
Thanks for the post. The easiest way is to delete the appointments is via the diary grid view. To do this please follow the steps below:
1) Click on the Switch to Grid View blue link (Next to the Diary Options button)
2) Click on the Search button
3) Search on Staff and select the staff member in question
4) If you know of a date range you can enter this into the Start field
5) Click OK when you are happy with thisWhen you can see the appointments in question group select them and delete them.
Hi Michelle
Thanks for the post. I am not too sure if I quite follow along with having several different patients enter their session notes at the same time. Would it be possible to elaborate on the particular scenario you are thinking of?
If it is a case that you are allowing the patient to type in information onto the session notes via the diary screen then what you can do is set the diary screen to “Private Mode”. This will show on the diary that there are appointments booked but the description on the appointments will be hidden and just say [Booked]. This way the patient will not be able to view who else is having an appointment. Would this cover what you need?
Hi Quentin
Thanks for the post. It is possible to add the ‘Appointment Details’ so that the appointent date that the charge was raised on will appear up on an invoice line. In order to do this please follow the steps below.
1) Open the ‘Raise Invoices from Charges’ window
2) Towards the bottom right there is a small blue link which says “More Options“, click on on this
3) Tick the option for Appointment DetailsNow when you raise an invoice the appointment details, which includes the appointment, date will appear on the invoice line. This will help to distinguish the multiple items you may have on an invoice.
Please let us know if this is not quite what you are looking for.
Hi Roelof
Does the report from jospore cover this as it does calculate the total balance that a patient has? If it does not, what needs to be altered on it in order for it to work?
Hi Steve
Thanks for the question. With ClinicOffice v5 it is possible to update multiple records using the batch update feature. To use this feature please follow the steps below:
[1] Go into the Patient section of ClinicOffice
[2] Perform your search for the relevant patients
[3] Left click on one records and press the Ctrl and A keys both together
[4] Right click on one of the highlighted records
[5] Go to the Batch Update and select Clinic
[6] Tick the clinic you wish to assign them to and click OKThis will move all the selected patients over to the new clinic. Hope this helps.
Thanks for the post. It sounds like some of the fields in the report templates are not configured to use your local date/time format. To edit this please follow the steps below:
1) Go to the Report and Templates section in ClinicOfffice
2) Right click on the report template causing you problems i.e. “Invoice”
3) Select Design Template
4) Left click on the date field which is in the US format
5) When the field is selected a small arrow will appear to the top right of the field, click on this
6) Left click on the three dots on the Format String field
7) In the new window that appears, under the Category header select DateTime
8) Click the Custom tab and select “d” (this reverts the date to your local system settings)
9) Click the OK button
10) Repeat steps 4-9 for any other faulty date fields
11) When you are finished click the Save buttonPlease use the steps above for any other receipt/invoice template reports that have the same issue. Please let us know if you need anything clarifying in the steps above.
Hi Tony
Thanks for the email. The non standard or custom staff field that you are using would be stored in the “custom_staff_fields” table. This means that you would need to perform a left join to this table and then add the custom field above the “from staff”. Below is how you would add this field.
select


staff.id, staff.id as staff_id, staff.knownas as _knownas, staff.username, staff.jobtitle,

staff.accgrp_id, accgrp.name as _access_group, staffcat_id, staffcat.name as _staffcategory,


custom_staff_fields."University_of_Greenwich_ID"


from staff

left join accgrp on staff.accgrp_id=accgrp.id

left join staffcat on staff.staffcat_id=staffcat.id

left join custom_staff_fields on (custom_staff_fields.staff_id=staff.id)


where (staff.deleted <> true)
Something to note about the SQL above is the line
custom_staff_fields.”University_of_Greenwich_ID”. You will note that I have put quote marks around the field University_of_Greenwich_ID. You only need to put quote marks around a field name if the field name has any uppercases involved. If the field does not have any uppercases you can just type custom_staff_fields.university_of_greenwich_id instead.Please can you find out how the way the field name is formatted and enter it into the SQL accordingly. The field name can be different to the display name. To find out the field name please go to the Design tab in the staff editor, click Enter Design Mode button, right click on the field “University_of_Greenwich_ID” and select Edit Field.
Hope this helps.
After having a look into the problem using the additional information you emailed through to us, we have been able to send and receive emails. We did however need to tweak some of the settings i.e. the port number.
Your POP settings are fine, the only adjustment you need to make is to the authentication method set to Auto. To do this please follow the steps below:
1) Open your Email Account Manager Screen
2) Click the Advanced Settings blue link (this is right of the “Disable this account”)
3) Set the Authentication Method to Auto
4) Click OK and then SaveYou will find that you can now receive emails.
As for your SMTP details I did that the only way I could send emails was to set my port to 25 and untick the Use SSL. I did find that the Send Test Email was still coming up with a timeout message, but when I sent a normal email using port 25 and no SSL emails could be sent.
So after applying these changes you should find that you can send and receive emails from ClinicOffice.
Please let us know if you have any problems with following the above steps.
Hi Eniola
Thanks for the post. From what you have described it appears the connection to your email service provider is timing out before there is a response. By default this is set to 30 seconds. You can change this by doing the following:
1) Go to the Email Manager
2) Click the Configure Email Accounts link
3) At the moment of the Email Account Manager screen that would have opened, increase the Connection timout after section.
4) Click SaveAfter doing this please try your emails again and see if it is working.
If you are still having problems please feel free to post a reply on the forum.
Hi
Thanks for post. It appears the layout of your session notes has been lost. To revert this back please follow the steps below:
[1] Open a session note
[2] Click on the Design tab
[3] Click the Enter Design Mode button
[4] Beneath the Add Field button, there’s a small “tag” button (please see the image below)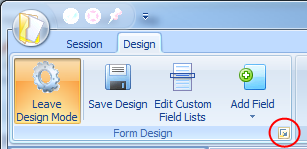
[5] Click this button and then select the layout you wish to revert back to
[6] Close the session note and open it againAfter doing this your layout for the session notes should be restored back to the way you had it previously.
Thanks for explaining further. We have been able to reproduce your problem back here and it appears that the problem is more deep rooted than we expected. We will now look into rectifying this issue and produce a fix as soon as possible.
Hi Dee
Thanks for posting more information, although I am not to sure if I follow. When you say you cannot see anything in the clinical form manager or you cannot open the form designer is it a case that the window is too small? If so you can hover your mouse over the edge of the window and resize it.
Alternatively do you mean that the fields are too squashed to see anything? If this is the case it might be an idea to go back to the form designer, selecting your form and clicking the Design button. Once in there select the field(s) and drag them into the Hidden Items window. You can then drag them back out and re-position them. Make sure you save the design.
If it is neither of these, would it be possible to provide us with a screenshot of your problem?
Hello
Thanks for your post. This can be caused for a number of reasons. Here are some things to try.
1) Make sure that your CSV file is not open in any other program such as Excel while performing the import.
2) If you are importing anything like an “id” field in your CSV files, make sure they are all unique and that numbers are not duplicated.
3) Sometimes Excel can insert additional blank rows or columns when you “Save As” a CSV file which can produce problems for the importer. If you’re using Excel, please try the following :-
– Click on the ROW HEADER of the first row which is blank (i.e. at the bottom of your data)
– Drag the mouse down so that you are select about 30-40 rows which look blank. Now right-click on one of the selected ROW HEADERS and choose DELETE.
– Repeat this process for the COLUMN HEADERS to remove any additional columns which are blank.
– Now save the file as a CSV file again and try to import it.Please let us know if you need any points clarifying or if you are still having problems after trying the above – many thanks!
Hi Plasticman
Thanks for the post. A supervisor/administrator account will be able to reset the password. Please login as a supervisor, go to the Staff Members section of ClinicOffice and open the staff member in question. Go to the Access Rights tab and click on the the Reset Password button. Enter a new password twice and click OK.
Hope this helps to solve the problem.
Hi Sally
Thanks for the post. Please check to make sure that your account details are correct. Your client id should be similar to this: LU0695845. Also please check your password as this will be different from the password you use to login to Textanywhere with.
You can find both the required client id and password if you login to Textanywhere and click on the Admin Panel.
If you are having problems locating this information please contact Textanywhere and they will be able to provide you with the relevant client id and password.
Once you have entered this information back into ClinicOffice you will then be able to send off SMS messages.
Hope this helps.
Hi Tony
Thanks for the questions. Please find the replies to your point below:
1) For the patient’s status of active and inactive it would be better to use the patient status field inside the patients record. Either way you would need to do this manually.
2) If you create a new report and use the SQL below you should be able to achieve what you require.
select
app.id, start, finish, app.per_id,
case
when (description is not null) and (description <> '') then description
else per.lastname || ', ' || per.firstname || ' with ' || staff.knownas || ' '
end as _description,

rtrim(per.lastname || ', ' || coalesce(per.firstname,'') || ' ' || coalesce(per.title,'')) as _patient_name,
staff_id, apptype_id, appstatus_id, app.clinic_id, room_id,
staff.knownas as _staff_name,
apptype.name as _appointment_type,
appstatus.name as _appointment_status,
clinic.name as _clinic_name,
room.name as _room_name,
app.createdon, app.createdby_staff_id, cr_staff.knownas as _createdby,
app.updatedon, app.updatedby_staff_id, up_staff.knownas as _lastupdatedby,

per.code, per.address1, per.address2, per.address3, per.towncity, per.county, per.postcode, per.email, per.telephone, per.worktel, per.mobile,

view_nextapp.nextapp,
view_prevapp.prevapp

from app
left join staff on (app.staff_id=staff.id)
left join per on (app.per_id=per.id)
left join apptype on (app.apptype_id=apptype.id)
left join appstatus on (app.appstatus_id=appstatus.id)
left join clinic on (app.clinic_id=clinic.id)
left join room on (app.room_id=room.id)
left join staff as cr_staff on (app.createdby_staff_id = cr_staff.id)
left join staff as up_staff on (app.updatedby_staff_id = up_staff.id)
left join view_nextapp on (per.id=view_nextapp.per_id)
left join view_prevapp on (per.id=view_prevapp.per_id)

where view_prevapp.prevapp=app.start
This will only show the latest appointment for the patient and will allow you to specify the appointment status. This means you can exclude DNAs or Cancelled appointments. Also the contact details will be on the report as well.
Please let us know if you have any problems with this.
Hi Plasticman
ClinicOffice will not automatically log you off unless someone has set up the AUTO-LOGOFF feature. This is available under the View tab | ClinicOffice Settings | Global Settings. You need to make sure that the “Log users off if idle for” is unticked in order to prevent it from logging you off automatically.
Hope this helps.
Hi Tony
Thanks for the post.
Rather than putting a character at the front of the mobile or landline you could place a ‘No SMS’ flag on the patient. Under the Contact Rule there should be a value that says “Exclude patients who have the following flags” and select from there the ‘No SMS’ flag. This way when the rule runs all patients with that flag will be excluded from the contact rule and hence will not receive an SMS.
Hi Mr Wal
Thanks for the post. Yes, our system does allow for you to send out automatic recall reminders although you will need to create the recalls first.
The recall reminder will allow you to specify the appointment type. So you could setup the recall rule to only send out a reminder to people who are due for one of your diabetic treatment types. So in short the answer is yes to your second question! 🙂
Please let us know if you require further information.
Hi Jo
Thanks for the question. By the very nature of an appointment status there should only ever be one status for an appointment. For something like ‘Will Ring’ this is not an ordinary appointment status but instead more of a task for yourself.
One option you could try is create a flag called ‘Will Ring’. Assign this flag a unique colour. I would imagine you would like a visual cue on the diary indicating that you should ring. You can make the icon for the flag appear on the diary by clicking on the Diary Options buttons, going to the Appointment Options tab, ticking the Show related flags which are of type and selecting your “Will Ring” flag. When you now assign the “Will Ring” flag to an appointment the flag icon will appear indicating that you need to call this patient. When you have finished with the flag you can delete it.
An alternative is to put into the appointment’s note field “Will Ring”. By default the appointment notes should show on the appointment in the diary.
Please let me know if you need anything to be clarified.
Hi Tony
The SQL below contains the patient’s notes field in it. To insert this please follow the steps below:
1) Right click on the Open Item Report
2) Select Report Sourrce
3) Go to the SQL Source tab
4) Select everything under the SQL source and delete it
5) Copy all of the code below and paste it in the SQL Source
6) Click OKselect per.id, per.id as account_per_id,
@name:per as _account_name, per.company, per.telephone, per.worktel, per.mobile, per.fax, per.email, per.dob, per.notes,
(coalesce(clinic.prefix, '') || cast(per.code as varchar(20))) as _patientcode,
per.clinic_id, clinic.name as _clinic,
per.patcat_id, patcat.name as _patient_category,
per.contcat_id, contcat.name as _contact_category,
per.patstatus_id, patstatus.name as _patient_status,
per.practitioner_staff_id, staff.knownas as _practitioner,
view_accbalance.balance
from per
left join clinic on (per.clinic_id=clinic.id)
left join patcat on (per.patcat_id=patcat.id)
left join contcat on (per.contcat_id=contcat.id)
left join patstatus on (per.patstatus_id=patstatus.id)
left join staff on (per.practitioner_staff_id=staff.id)
left join view_accbalance on (per.id=view_accbalance.per_id)
where (per.deleted=false) and (view_accbalance.balance <> 0)If an error appears when you click OK please repeat the steps and make sure that you delete everything.
With the grid report you can preview certain fields such as the notes field. To do this go to the Grid Options and under the Preview Field select Notes. Hope this makes sense.
Hi Tony
Thanks for your question. Although i do not know what the Open Items Report looks like, it does sound like it is a grid. With a grid report it is quite easy to add something like the notes field to it. Also with any grid view you can preview each field which is very handy for something like the notes field as you can view a few lines at a time below each main record.
If you want to paste the SQL of the Open Items report into a post and we can have a look and reply with the SQL for the notes field inserted into it.
To find the SQL go to the Report and Templates section of ClinicOffice, right click on the Open Items report and select Report Source. Go to the SQL Source tab and select all of the text. Copy and paste that text here.
Hi Tony
Thanks for the post. Yes it is possible to insert the notes field under the patient’s record into a report. Which report did you have in mind?
Hi Jose
The code seems to be working back here fine. Please make sure that you delete everything that is under the SQL source and click the SELECT ALL on the code that is above and re-paste it back in. This should work after pressing OK. The only reason why it may not is if you do not have custom case notes, in which case your copy of ClinicOffice will not recognise the custom case notes field and will throw a similar error.
Hi Jose
You can pull data from the custom case notes fields and insert them into a patient list. The only problem is that if a patient has more than one case note then the patient’s record will appear up more than once. The reason is that ClinicOffice will have to display the additional information.
If you still wish for this to be done it might be wise to make a copy of the patient list by right clicking on the report in the Reports and Templates section of ClinicOffice and selecting Copy. Rename the patient list to something like “Patient List with Case Notes”. You can rename the report by again right clicking on the report and selecting Rename.
The SQL source for such a report is shown below:
select per.id, per.code, per.lastname, per.firstname, per.title, per.middlename, per.knownas,
per.company, per.address1, per.address2, per.address3, per.towncity, per.county, per.postcode, per.country,
per.telephone, per.worktel, per.mobile, per.fax, per.email, per.dob, per.consent, per.sex,
per.insuranceref, per.createdon, per.updatedon, per.registrationdate,

(coalesce(clinic.prefix, '') || cast(per.code as varchar(20))) as _patientcode,
per.clinic_id, clinic.name as _clinic_name,
per.patcat_id, patcat.name as _patient_category,
per.patstatus_id, patstatus.name as _patient_status,
per.referredcat_id, referredcat.name as _referred_by,
per.maritalstatus_id, maritalstatus.name as _marital_status,
per.occupation_id, occupation.name as _occupation_name,
per.practitioner_staff_id, staff.knownas as _practitioner,
per.gp_per_id, rtrim(gp_per.lastname || ', ' || coalesce(gp_per.firstname,'') || ' ' || coalesce(gp_per.title,'')) as _gp_name,
per.invrecip_per_id, rtrim(invrecip_per.lastname || ', ' || coalesce(invrecip_per.firstname,'') || ' ' || coalesce(invrecip_per.title,'')) as _invoice_recipient,
per.insurance_per_id, rtrim(insurance_per.lastname || ', ' || coalesce(insurance_per.firstname,'') || ' ' || coalesce(insurance_per.title,'')) as _insurance_company,
per.refby_per_id, rtrim(refby_per.lastname || ', ' || coalesce(refby_per.firstname,'') || ' ' || coalesce(refby_per.title,'')) as _referred_by_person,
per.familyhead_per_id, rtrim(familyhead_per.lastname || ', ' || coalesce(familyhead_per.firstname,'') || ' ' || coalesce(familyhead_per.title,'')) as _family_head,
per.updatedby_staff_id, up_staff.knownas as _updatedbystaff,
per.createdby_staff_id, cr_staff.knownas as _createdbystaff,

@FIELDS:custom_patient_fields,
@FIELDS:custom_case_fields

from per

left join clinic on (per.clinic_id=clinic.id)
left join patcat on (per.patcat_id=patcat.id)
left join patstatus on (per.patstatus_id=patstatus.id)
left join referredcat on (per.referredcat_id=referredcat.id)
left join maritalstatus on (per.maritalstatus_id=maritalstatus.id)
left join occupation on (per.occupation_id=occupation.id)
left join staff on (per.practitioner_staff_id=staff.id)
left join per as gp_per on (per.gp_per_id=gp_per.id)
left join per as invrecip_per on (per.invrecip_per_id=invrecip_per.id)
left join per as insurance_per on (per.insurance_per_id=insurance_per.id)
left join per as refby_per on (per.refby_per_id=refby_per.id)
left join per as familyhead_per on (per.familyhead_per_id=familyhead_per.id)
left join staff as up_staff on (per.updatedby_staff_id=up_staff.id)
left join staff as cr_staff on (per.createdby_staff_id=cr_staff.id)
left join custom_patient_fields on (custom_patient_fields.per_id=per.id)
left join custom_case_fields on (custom_case_fields.per_id=per.id)

where (per.ispatient=true and per.deleted=false)
This will display both custom fields from the patient’s record and the case notes. Please let us know if you require anything else.
Hi Jose
Thanks for the post. To insert custom fields into the patient list please do the following:
[1] Go to the Report and Document Templates section in ClinicOffice
[2] Right click on the Patient List report
[3] Select Report Source
[4] Go to the SQL Source tab
[5] Delete everything that is the main field on this window
[6] Copy and paste the code below into this main fieldselect per.id, per.code, per.lastname, per.firstname, per.title, per.middlename, per.knownas, per.company, per.address1, per.address2, per.address3, per.towncity, per.county, per.postcode, per.country, per.telephone, per.worktel, per.mobile, per.fax, per.email, per.dob, per.consent, per.sex, per.insuranceref, per.createdon, per.updatedon, per.registrationdate, (coalesce(clinic.prefix, '') || cast(per.code as varchar(20))) as _patientcode, per.clinic_id, clinic.name as _clinic_name, per.patcat_id, patcat.name as _patient_category, per.patstatus_id, patstatus.name as _patient_status, per.referredcat_id, referredcat.name as _referred_by, per.maritalstatus_id, maritalstatus.name as _marital_status, per.occupation_id, occupation.name as _occupation_name, per.practitioner_staff_id, staff.knownas as _practitioner, per.gp_per_id, rtrim(gp_per.lastname || ', ' || coalesce(gp_per.firstname,'') || ' ' || coalesce(gp_per.title,'')) as _gp_name, per.invrecip_per_id, rtrim(invrecip_per.lastname || ', ' || coalesce(invrecip_per.firstname,'') || ' ' || coalesce(invrecip_per.title,'')) as _invoice_recipient, per.insurance_per_id, rtrim(insurance_per.lastname || ', ' || coalesce(insurance_per.firstname,'') || ' ' || coalesce(insurance_per.title,'')) as _insurance_company, per.refby_per_id, rtrim(refby_per.lastname || ', ' || coalesce(refby_per.firstname,'') || ' ' || coalesce(refby_per.title,'')) as _referred_by_person, per.familyhead_per_id, rtrim(familyhead_per.lastname || ', ' || coalesce(familyhead_per.firstname,'') || ' ' || coalesce(familyhead_per.title,'')) as _family_head, per.updatedby_staff_id, up_staff.knownas as _updatedbystaff, per.createdby_staff_id, cr_staff.knownas as _createdbystaff, @FIELDS:custom_patient_fields from per left join clinic on (per.clinic_id=clinic.id) left join patcat on (per.patcat_id=patcat.id) left join patstatus on (per.patstatus_id=patstatus.id) left join referredcat on (per.referredcat_id=referredcat.id) left join maritalstatus on (per.maritalstatus_id=maritalstatus.id) left join occupation on (per.occupation_id=occupation.id) left join staff on (per.practitioner_staff_id=staff.id) left join per as gp_per on (per.gp_per_id=gp_per.id) left join per as invrecip_per on (per.invrecip_per_id=invrecip_per.id) left join per as insurance_per on (per.insurance_per_id=insurance_per.id) left join per as refby_per on (per.refby_per_id=refby_per.id) left join per as familyhead_per on (per.familyhead_per_id=familyhead_per.id) left join staff as up_staff on (per.updatedby_staff_id=up_staff.id) left join staff as cr_staff on (per.createdby_staff_id=cr_staff.id) left join custom_patient_fields on (custom_patient_fields.per_id=per.id) where (per.ispatient=true and per.deleted=false)[7] Click OK
You should now see your custom patient fields on the Patient List report.
Hi Carol
Thanks for letting me know.
Hi Carol
Thanks for the post. Would it be possible to provide us with the procedure that you would like to use when dispensing the medication to each patient. For example is it a case that you would like the system to say that patient A has 60 of tablet B every month or is it a case that there is a reduction every time you allocate so much medication to a given patient?
Look forward to hearing from you.
Hi Richard
Thanks for the post. This sounds like you need custom fields to be displayed in the patient grid in order perform a search on the diabetic patients. To display custom fields on the patient grid please follow the steps below:
[1] Go to the Patient grid in ClinicOffice
[2] Click the Grid Options button
[3] Click the Edit link (this is at the top of the Grid Options panel)
[4] Under Grid Sources right click on a blank area and select New
[5] Enter a name like Custom Fields and click OK
[6] Please copy and paste the code from below into the SQL Source fieldselect per.id, per.code, per.lastname, per.firstname, per.title, per.middlename, per.knownas,
per.company, per.address1, per.address2, per.address3, per.towncity, per.county, per.postcode, per.country,
per.telephone, per.worktel, per.mobile, per.fax, per.email, per.dob, per.registrationdate,
(coalesce(clinic.prefix, '') || cast(per.code as varchar(20))) as _patientcode,
per.clinic_id, clinic.name as _clinic,
per.patcat_id, patcat.name as _patient_category,
per.patstatus_id, patstatus.name as _patient_status,
per.practitioner_staff_id, staff.knownas as _practitioner,
@FIELDS:custom_patient_fields
from per
left join clinic on (per.clinic_id=clinic.id)
left join patcat on (per.patcat_id=patcat.id)
left join patstatus on (per.patstatus_id=patstatus.id)
left join staff on (per.practitioner_staff_id=staff.id)
left join custom_patient_fields on (custom_patient_fields.per_id=per.id)
where (per.ispatient=true and per.deleted=false)[7] Click the Save button and then the Close button
You will now be able to see the custom patient fields. This will enable you to then search for diabetic patients and the grid will then show you the total number of diabetic patients.
Hope this information helps.
Hi MILONOU
Thanks for the post. I assume when you refer to the ‘host PC’ you mean the client PC. The HOST PC is the one which hosts your database, while the “CLIENT” PCs access the database on the host computer.
Please check and make sure that your client computer can see the folder via windows explorer. One way of doing this is provided in the steps below :-
– Go to the Start menu in windows
– Go to Run (Windows XP) alternatively click on the Search field (Windows Vista or 7)
– Type in two backslashes (\) and then the name of the HOST computer
e.g. \server-pc
– Press the Enter buttonIf Windows can find the host computer, it will appear pretty soon in a new explorer window.
If it cannot it will appear saying something like ‘Windows cannot access this location’. This may take some time before it appears. If this is the case please check to make sure that file sharing is enabled on your main server machine.
The third possibility is that windows may ask you for a username and password. If this is the case it is best to close this window down, go to the main host machine and make sure that the windows file sharing is enabled without a password.
I hope this information is of some use and please let us know what the outcome is.
Hi Mesologie – thanks for informing us of this.
We have been able to reproduce this problem and we’re looking into it. The problem only occurs once on the very first time that you go on to the diary team. All you need to do is click the REFRESH button and then everything will be fine from there on.
As soon as we have found what is causing this, we will release an update to fix the issue.
Hi
Thanks for explaining which report you wish to insert the appointment start field into.
Enter into the Report Source. Above the from inv line and just after the last statement insert the following:
,app.start as appt_dateBelow the from inv line is a list of left joins. Left click at the end of the last left join and press the Enter key. Type in the following:
left join app on (app.id=inv.app_id)Click OK when you have done this.
You will now be able to insert the appt_date value into the invoice report. Please make sure that when you insert the appt_date you change it to a date format within the design editor if you only want the date to appear for the appointment.
Hope this helps.
Hi plasticman
Thanks for the post. At present there is not an automated system to send reminders to staff members informing them that they have an appointment, although we have had a number of requests for this so we have added this to our Todo list.
To do this manually at present you will need to go to the practitioners record and send a text from there. A quick way to do this is to send the message via the Diary. On the right hand side of the Diary under the Diary Options is a list of the practitioners. If you right click on the practitioner and select Edit this Staff Member. Click the mobile icon on the mobile field and then enter the message you wish to send to them. Do not forget to save the template if you need it on a regular basis. Then click the Send button.
As i said before we have now got it down on our Todo list to make this process more automated.
Hi Mark
Thanks for the post. In this situation it is a case of changing the name format. If you go to the Appointment Captions tab on the Diary Options you will see the Alternate Format field. By default this is greyed out. If you un-tick the Use default name format checkbox, the Alternate Format will become editable. From here you will be able to select a different name format.
Unfortunately there is not a format that matches Title Firstname Lastname Code, but you can select a format that is close. You will see the Title/First/Last or Complete, both of these options come close but do not include the patient’s code. If you require the patient code then you could use the Code Lookup option. This doesn’t provide you with the name in the exact format you have stated but it is close.
Hopefully this information is of some use.
-
AuthorPosts